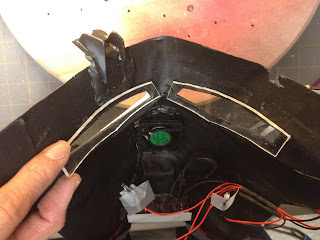
Eye Lens:
Here we go again! My second (and hopefully FINAL) attempt at making the eye lens for the build.
To recap my requirements on this sub-project:
- Must not limit my vision, much
- Should have detail
- Tinted yellow
- Must be lit up.
- Lights must not be seen from the outside
- Lights must not be glaring back at MY eyes.
Had put a lot of thought back into this one. Going to start off with a piece of clear lexan plastic. I think this is good approach.
Since I already have the shape of the eye lens from the previous build attempt. I'm going to use it as a template for the curvature. Here I'm laying it down on a piece of 2x4 wood. I needed a shape to put the melting plastic onto. And the wood can handle the heat.
Cutting the shape out with a jigsaw.
I stole this toaster oven from my wife years ago. Started out when I was secretly baking my sculptures in it before. Got caught by the wife.. and said something, something.. and she just gave me the oven! Woohoo!! Score! Anyways, inside the oven is a couple strips of lexan plastic. Warming it up for 5-10 minutes. The moment I can see them droop, I pull them out and put it on my wooden form....
Almost lost this piece. You can see some bubbling at the corners! Luckily, the bubbles are outside and would be cut off.
Cutting them out with my dremel.
Quick test fit. PERFECT!
Now, for the details. I'm thinking of frosting them in. To achieve that, I just mask out a simple design. With my dremel again, I used a steel brush attachment, and just went over the exposed areas.
I could use some fancy window etching solution to frost the details. But, that would mean money. And I rather not spend money if I didn't have to. The return wasn't worth it. Simple economics. hehe
TEST: Can I see out of the new lens?
Yes! Yes, I can. Even in the frosted areas, I can see vague shapes. So, this is successful.
TEST: Does the detail light up?
Yes, perfectly!! Success, again!
TEST: Are the lights visible from the outside?
Nope. Since the lights would be mounted just out of sight. It's perfect again. Another Score!
TEST: Would the lights be glaring back into my eyes/face?
Nope, eventually, I will be mounting the LEDs with hot glue. Then I'll be painting the globs with dark matte paint. The light would only be directed at the lens itself.
PERFECT SCORE!!


