Showing posts with label mold. Show all posts

Sunday, 11 March 2012

Experi-mold: Conclusion

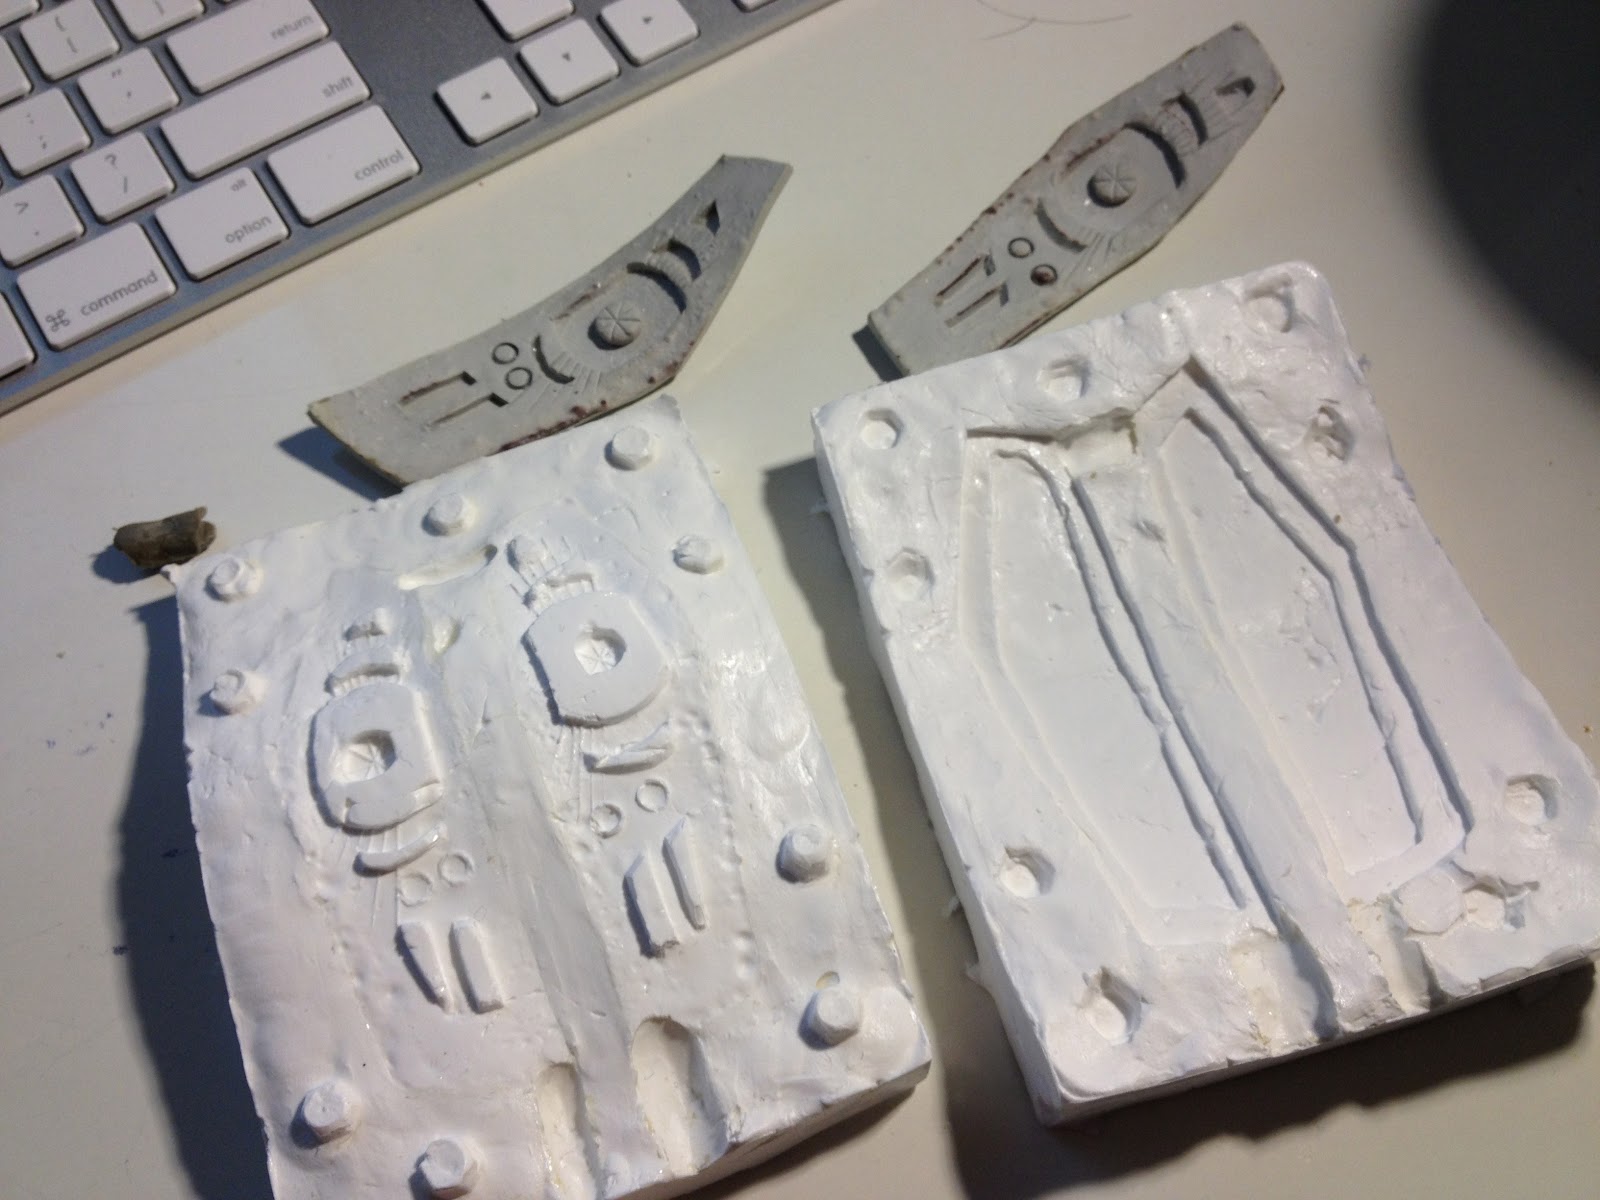
From the first half of the mold, I knew the second half would come apart without any difficulties. 


Upon closer review, the details are horrendously inconsistent! It picked up some super fine lines here and there. BUT, leaving huge gaps and bubbles everywhere. I guess I could have spent some more time and care applying the first coat of silicone. 

I've already gone this far, might as well go through with it and see how it fares at the resin stage. I attempted to fill in some of the bigger gaps. Then coated both halves with vaseline. Again, this is the releasing agent that will (hopefully) separate the resin from the silicone mold.

I should break here and explain what those channels are for. The ones I made a few posts back.
This diagram should explain it a bit better. Once the halves are together, it's difficult for me to make sure the resin gets into every corner. So, the channels are made to 'guide' the resin through. Essentially, making a one-way path for it to travel. The second channel (at the bottom) connects the two lens together. I'll cut it out when it's de-molded. The third channel, the one that's marked "Air out" is for.. well.. the air to escape. If i didn't have this outlet, the air would get trapped, the resin wouldn't be able to displace the air to fill the mold. It's also a good 'window' to use to see when the resin is filling the mold properly. When you see resin come through this hole, you know you're done.


Used the box again for support. I can already feel how unstable the entire hold is at this point. So, I attempted to brace it a bit with some clay here and there.


The resin pour.

and....FAIL!!! As expected, the resin leaked out of the sides. I doubt this silicone mold would have worked if I built a hard mother mold around it. It's just too flimsy. O well, I anticipate this wasn't going to work from the beginning. It was an experiment after all. Only thing I lost is a bit of time, and $3 for the tube of silicone. That's my price for education.

Now, I have to start again!

Monday, 5 March 2012

Experimental Mold Process

Silicon Caulk Mold:

So, my catalyst dried up on me. I can't make my mold for the eye lens the usual way. And I'm too impatient to wait again for another order through snail mail. I YouTube'd a new process. (at least to me). Where, instead of RTV rubber mold, you can simply go cheap and just use a tube of silicone. Right from the hardware store! Thought this might be fun to experiment with new techniques. It looks like its one of those 'it's crazy enough, it might just work'. Who knows, if this works out, I may use this method in the future.

The process calls for:
- Cup of soapy water
- releasing agent. (I use Vaseline) with cotton swabs.
- Silicone caulk
- Caulk gun
- Organic Respirator (with canisters) or well-vented area.


Because the silicone was made for bathtub/kitchen repairs, it has inherent adhesive properties. It makes a mess. But, once dried, it's no longer sticky.

I coated the entire area with Vaseline and cotton swab. Making sure every corner is coated with it evenly. No extra globs anywhere. The vaseline will  add a layer between the silicone and the mold, eye lens, and walls.. so, I can separate them apart later. (Hopefully!)

TIP: Use the organic respirator. The ones with 2 carbon filter canisters on the sides. Silicone is super smelly. Like strong vinegar. And it's super toxic. A simple face mask will not do.

To start, I laid down one line of silicone. Then dipped my finger into the cup of soapy water, and started to press down on the silicone. Flattening it all out across the surface. Slowly working it and pushing it into every area. Taking caution not to go too fast as to leave air bubbles anywhere. The layer at this point is pretty thin. About 1/8" all around. The soapy water will cause the silicone to just slip around your finger. It's a pretty cool trick. The water actually acts as an accelerator to the silicone. So, it's a plus plus.

I'll leave this to dry complete overnight. And repeat 2 more layers.

I don't have a whole lot of confidence in this method. I'm actually expecting this to fail. But, I still have to give it a try.

My prediction: The vaseline would fail. And the silicone would stick to everything. Causing me to lose my lens. I'll either have to start over or just suck it up and pick another alternative in making the eye lens. Any bets?

We'll find out in a few days...


Saturday, 3 March 2012

The Eyes Have It (part 2)

The Mold:

This part will be the same as the mohawk lens build.  Plasticine for the base and plastic for the walls.


The difference from the mohawk build is the fact that we need to make a second half mold. So, we need to make "keys" so the 2 halves can join back exactly in the same spot.
TIP: Just found a pencil. Pushed it down around 1/8".  Those 3 little "noodles" that are attached to lens are there to mold the channels where the resin and air will be travelling through. I'll explain this during the resin build.

TIP: Once the walls are up, I drew a "pour line". It's roughly .5 inch high. This line will tell me when to stop pouring the mold liquid. Any less, then the mold would be too thin... any thicker, then it's just a waste of good (expensive) mold material. It's my goldilocks line.

I had a new box of RTV Rubber Mold stored away for years. It's a 2 part mix compound. 20:1 ratio (Rubber:Catalyst). I was going to start this half tonight, but when I opened up the box... I found the catalyst was completely dried out! UGH!

Now, this sub-project will have to wait till I can make a trip out to the supply store. 

I hate delays when I'm inspired and motivated.