Showing posts with label resin. Show all posts

Sunday, 11 March 2012

Experi-mold: Conclusion

From the first half of the mold, I knew the second half would come apart without any difficulties. 


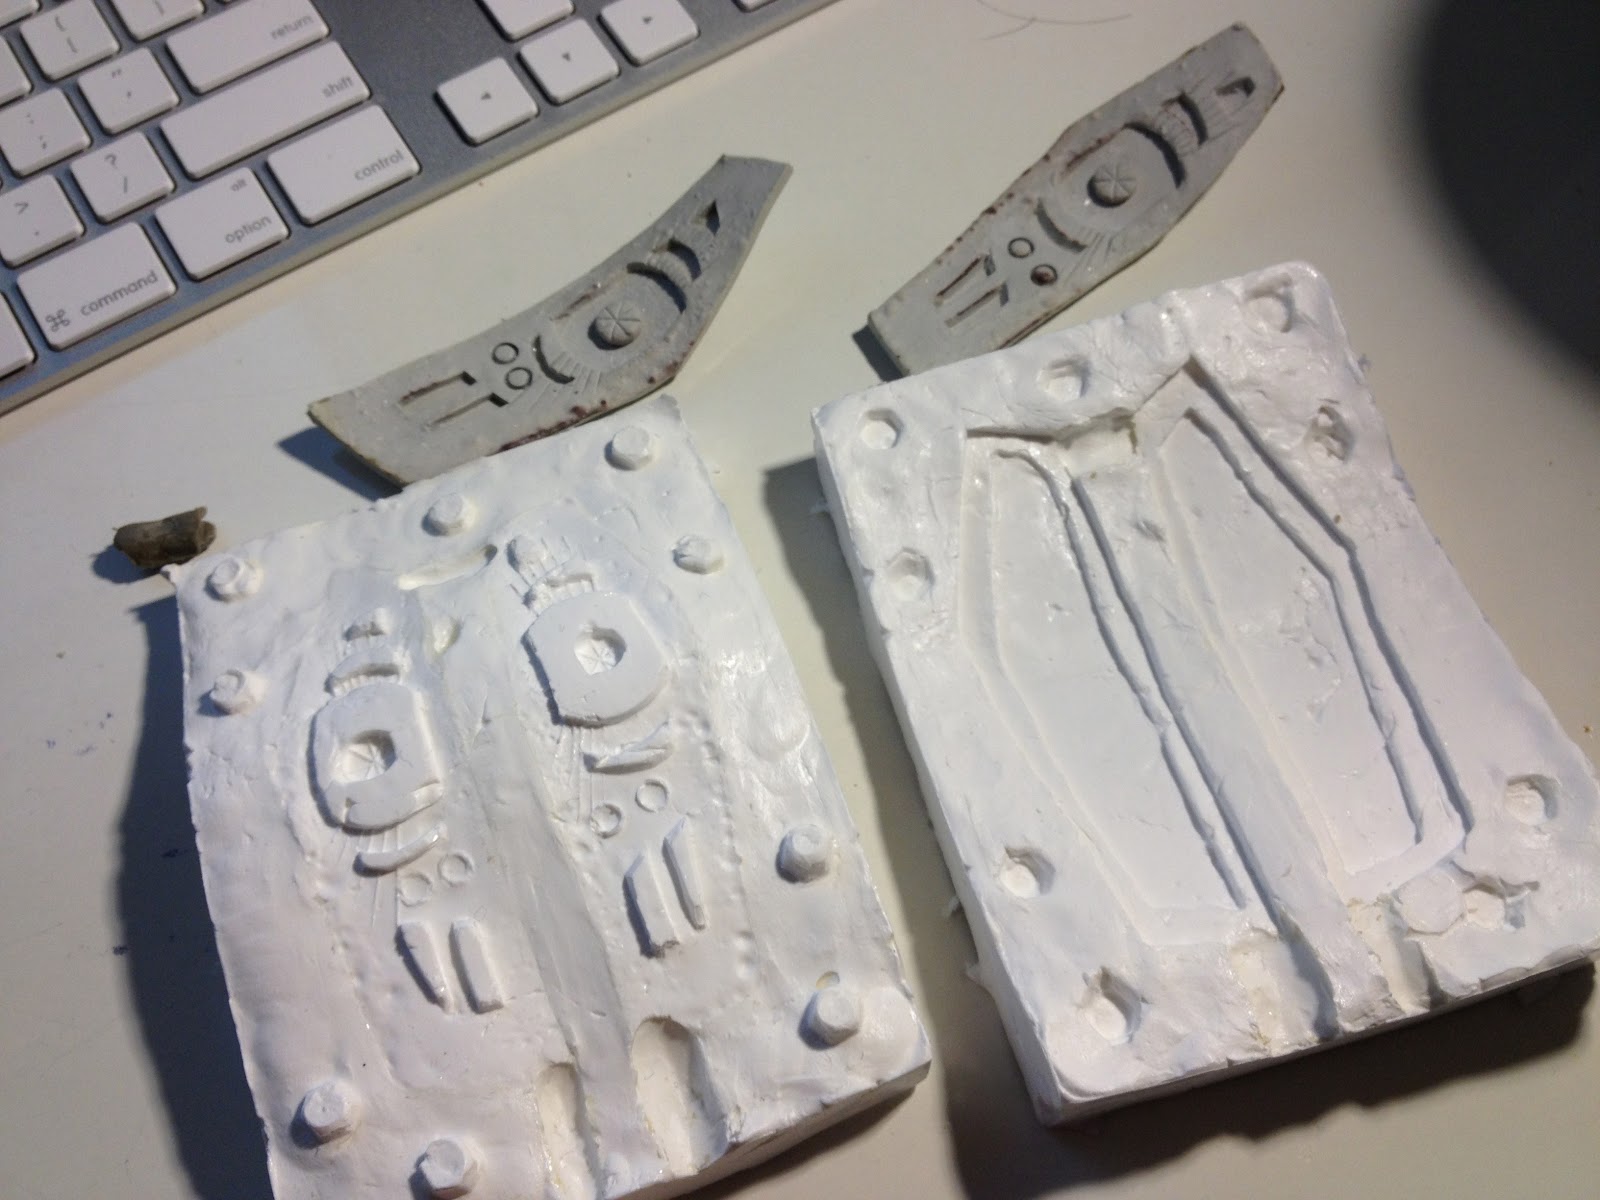
Upon closer review, the details are horrendously inconsistent! It picked up some super fine lines here and there. BUT, leaving huge gaps and bubbles everywhere. I guess I could have spent some more time and care applying the first coat of silicone. 

I've already gone this far, might as well go through with it and see how it fares at the resin stage. I attempted to fill in some of the bigger gaps. Then coated both halves with vaseline. Again, this is the releasing agent that will (hopefully) separate the resin from the silicone mold.

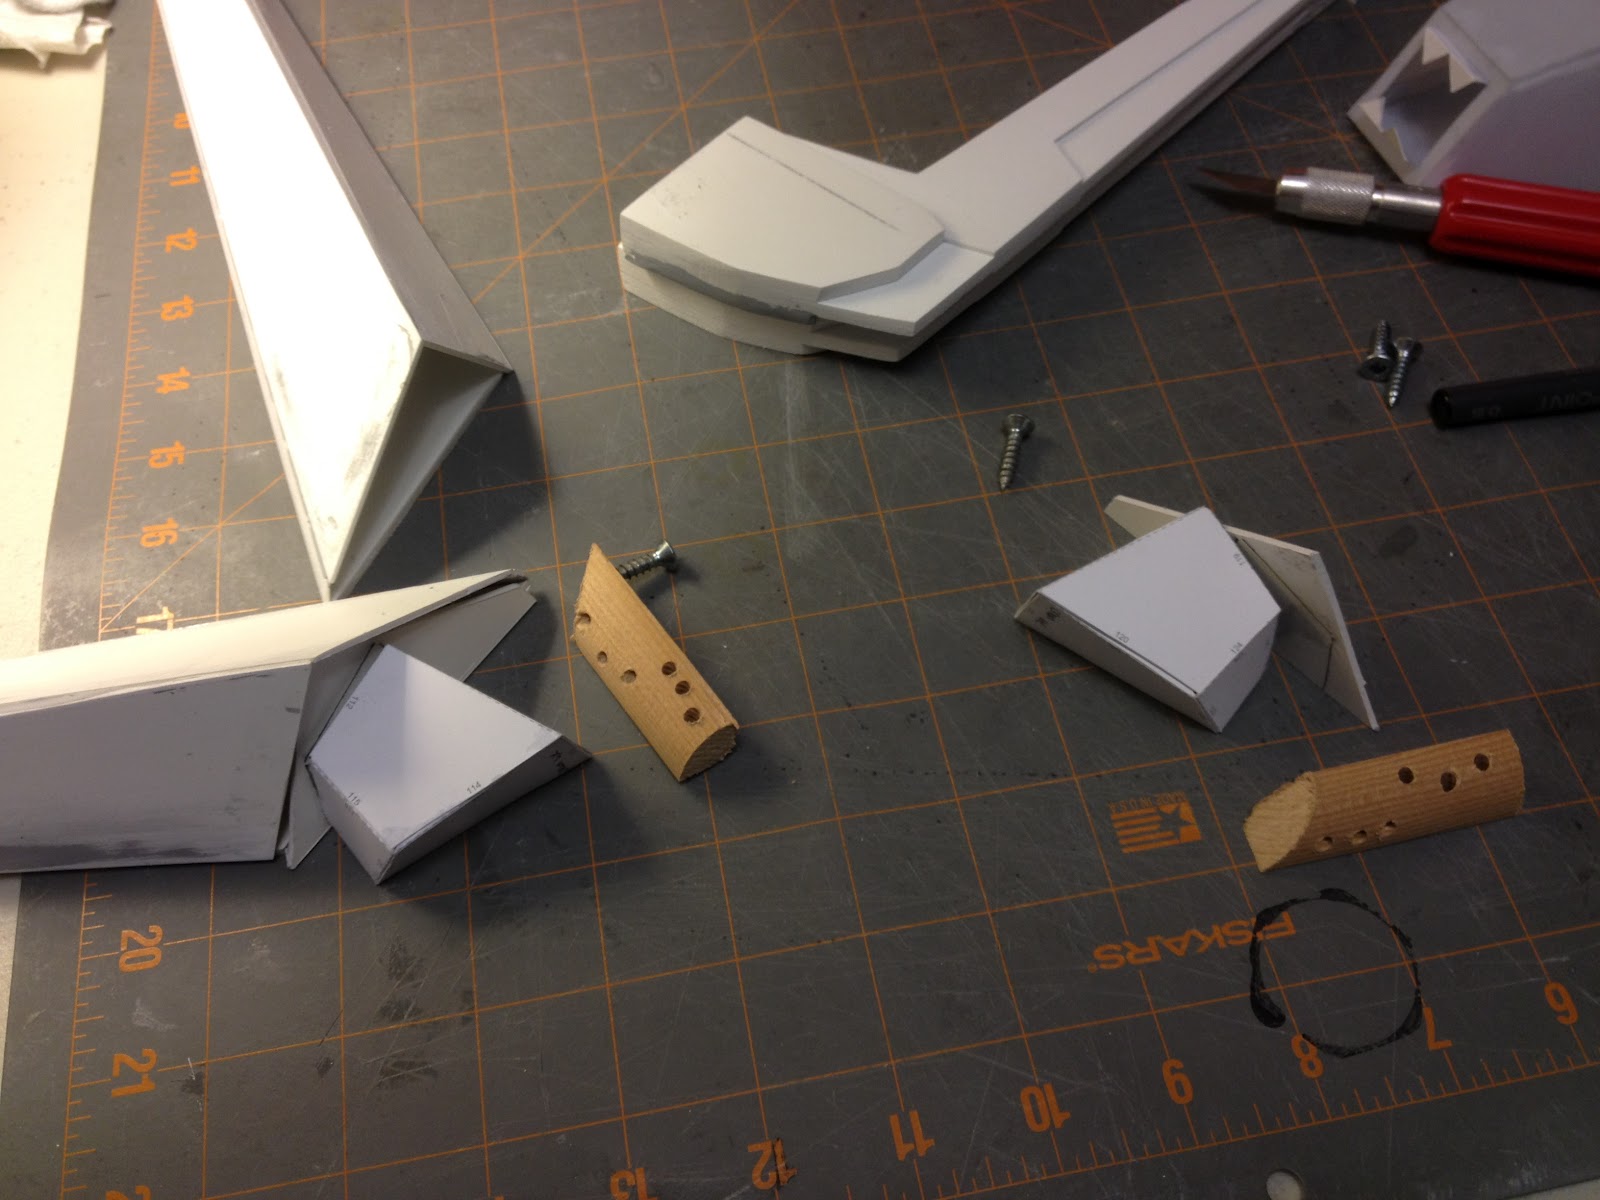
I should break here and explain what those channels are for. The ones I made a few posts back.
This diagram should explain it a bit better. Once the halves are together, it's difficult for me to make sure the resin gets into every corner. So, the channels are made to 'guide' the resin through. Essentially, making a one-way path for it to travel. The second channel (at the bottom) connects the two lens together. I'll cut it out when it's de-molded. The third channel, the one that's marked "Air out" is for.. well.. the air to escape. If i didn't have this outlet, the air would get trapped, the resin wouldn't be able to displace the air to fill the mold. It's also a good 'window' to use to see when the resin is filling the mold properly. When you see resin come through this hole, you know you're done.


Used the box again for support. I can already feel how unstable the entire hold is at this point. So, I attempted to brace it a bit with some clay here and there.


The resin pour.

and....FAIL!!! As expected, the resin leaked out of the sides. I doubt this silicone mold would have worked if I built a hard mother mold around it. It's just too flimsy. O well, I anticipate this wasn't going to work from the beginning. It was an experiment after all. Only thing I lost is a bit of time, and $3 for the tube of silicone. That's my price for education.

Now, I have to start again!

Thursday, 23 February 2012

Mohawk Lens

Molding/Casting:

There is a forehead camera on most every Gundam. It's in the area right above the V-fins.

The lit green box above the eyes.


Putting in video cameras and integrating a sort of CCTV system into the helmet proved to be too expensive, I'll just make something fancy in its place. I'll leave that option open when I win the lottery. Then again, if I win the lottery, I'll build a full scale working Gundam!

 Building the mold out of plasticine. Designed it with random shapes so it looks anime-ish/mechanical.

Built up walls for the pour

Here's a quick video of me mixing up the resin...


Gave a couple days to dry and harden up good. 90% of all the tiny bubbles also rose up to the surface and popped. (I had initially coaxed some of the bubbles out of the corners/cracks with a pin) Take the mold off, scraping out the plasticine out with sculpting tools. Getting it out of every nook and cranny.


Tinted it clear blue. Planning on putting some LEDs behind it to shine through. The light should refract around the odd shapes I made. Showing all the detail.

Made a little box to mount the LEDs ... whenever they come in the mail.

The test fit. Lookin good.

Tuesday, 7 February 2012

I can't breathe!

On the subject of ventilation, I was thinking where I should put my mini fans.
Since I cut out these side vents, I can place the fan units behind a screen inside the vents. Heck, I can even rig it so I showcase those running fans. 


Even though these fans run super silent, having them an inch away from my ear can still be annoying. If it's not the fans' noise, then it's the air being pushed through that I will hear.

...Or I can place them behind the vent holes/nostrils. This would give me direct flow of fresh air. I think this route is best. 


And to vent the hot air outward, I chose the most logical place. On the tail end of the "mohawk" piece. 


Sunday, 5 February 2012

Horns: part 4 (Assembly)

"Crown" or Base:

The Base is where the horns will be attached to. And the base itself attaches to the forehead of the helmet

Inside (and out of focus), you can see 2 black strips. These are metal plates. (Random junk I found around the house) These are glued down with superglue. Their purpose for which I may or may not use, is the contact points in which the magnets would attach themselves to the rest of the helmet. (the forehead)

 Ripped up a square of paper towel.

These are for "fillers" inside the "crown" and the "horns". It would fill the empty space inside, grabbing the wooden posts and sticking them onto the inside walls of the horns.

Backside of the entire assembly.

- Metal plates (shown in light brown)
- Paper towels (shown in green squiggly lines) - They fill the volume of space inside
- Wood with screws (shown in grey) - The paper towels are soaked with resin and would 'grab' onto the wooden dowels and nails. Just randomly wrapping around them. Making sure the towels also touch all sides of the walls.  Both unifying everything and giving it strength.

You can see the entry holes where I pour my resin into. Filling whatever space there is. This would give the proper solid feel to the entire assembly.


80% done. Ready for details and paint!

Saturday, 4 February 2012

Horns: part 3 (Assembly)

Horn Assembly:

"Horns" all cut and glued. Time to finish it off all the edges with a little modelling putty.
(Pic above: underside with detail)


All edges sanded smooth. I left the 'end caps' open. Reason being I needed to figure out how to anchor each horn onto its base. If I were to simply just glue the cap on... it would be fine, if it was a model that I let sit on the shelf. But, this helmet needs to endure a lot of motion. The thin bead of glue would never hold its weight of the horns, it would tear it off the base pretty fast.


Looked around and found some scrap wood. This will give it a good anchor to the base. So, I plan on using resin to bind it all together. Drilling random holes into the wood to give the resin something to grab onto. A few screws would help this too. You can tell, I'm totally improvising now.


Totally forgot to mention where I got my inspiration from. A model of a Strike Freedom Gundam by an artist Min Bong-Gi. His work is simply awe inspiring.


My costume will be 80% from his design. And I'll throw in things here and there.

Friday, 3 February 2012

Horns: part 2

Horns:

From the paper template I printed out off of Pepakura, I cut more pieces from the plastic sheet. Gluing them together with plastic cement


The second pair of "horns" are basically glorified tetrahedrons. Throwing in a few details here and there. It'll be strong and lightweight.


Thursday, 2 February 2012

Horns

Horns:

I think for the next little bit, I'm going to focus on the "horns" or antennas or whatever-you-call-ems. They are the 4 long protrusions that come off the forehead. I had a concern where these long horns where I would bump into walls and doorways constantly and eventually break off. Totally see this happening because I have zero peripheral vision. Only looking out of 2 tiny holes directly in front of me.

So the solution would be to make them strong and maybe 'break-away-able'. So, if I do hit something, it simply comes off.. and I can put it back together again without any damage.

My solution for the strength part would be to use a different material. Metal would be too hard to fabricate with and it would be too heavy. The paper/resin would be too weak since it's hollow. Difficult to reinforce the insides. So, I'm going with plastic. I picked up a huge sheet of plastic at Industrial Paint and Plastics. (They sell all kinds of cool industrial building stuff. Same place where I picked up the measuring cups and resin kits)


(Small) Obstacle: I had to go back into Pepakura to print these shapes out on regular paper. Since I'm not going to use them in the same fashion as the rest of the build. I'm just using them as cutting templates. So, I left out the tabs and numbers too. Had to go back into Maya to adjust the model of the long horns. This way I can break them into 2 shapes that run arcross 2 pages. Couldn't fit the horn onto one single 8.5"x11" paper.


.080 gauge plastic

TIP: Make sure that blade is still sharp! You have to make a few SLOW accurate runs on each cut. Being extra careful not to swipe that blade across any of my fingers! Don't really need to cut all the way through, once it's past halfway.. you can just bend-break it off. Still has a clean edge. Sand if not.

Plastic Cement is what I used to sandwich them all together

Love modelling putty. Goes on easy. Cures fast. Sands smooth. 
(Picked up a couple tubes at the local hobby store)
Sanding the putty down smooth. Then sanded the entire piece. Same reason why I sand down all my Gundam models, to rid the plastic of its manufacturing oils. This will give the primer a good surface to paint on.

All edges sanded down smooth. It's got a great solid feel to them now. Not worried about banging them around.


Again.. with the mock fits. Liking it!

The solution for the 'break-away' horns.. so they don't actually BREAK. I think I'm going with rare-earth magnets. They're super strong and can easily hold the weight of each horn. (In the above picture) I've tested the magnets' strength. So far so good. If that isn't enough, I can always go with hook and loop (Velcro). Or maybe a combination of both. This is also a good idea for when it comes to storage.

Tuesday, 31 January 2012

Reinforcement


I've got a nice thin coat of resin throughout the entire inside shell. Good and tacky for the next part of the procedure. The reinforcement. Something to give it a bit more rigidity.

If it was just the paper, it'd be just floppy. And if it was just the resin coating, it would be brittle. It'd crack and things would break off, it'd be a mess. You need something to bind it all together. Like all composite materials like carbon fibre and fiberglass, the process usually includes some sort of fabric for the resin to permeate into and bond. The fabric would give it both strength and flexibility.


The Fabric:
 This fabric is from the fabric store. Just a simple sheer material at $7 for a square yard. Plenty for this project. Just pick something with strength, has plenty of holes, and thin enough that can bend over small shapes.


Obstacle! It's a minor one. I fitted the helmet over my head and noticed the neck opening is a tad tight. Not like I was claustrophobic or anything. Just wanted a bit more room. So, with a pair of scissors, just trimmed it off a bit. 

TIP: At this stage, the paper and thin layer of resin was still easy to cut through. This is really the only time to make these adjustments. After I put the fabric in, scissors won't cut it. Only a dremel too would work then. So, plan accordingly!


Pre-cut the fabric into small manageable pieces. Make enough for one good batch of resin. Actually, make MORE than you need. It would be difficult to stop in the middle of the resin process just to cut more fabric.


The Resin Process:

System Three is a resin that was rated for indoor application. Most are super toxic that MUST be used outdoors or with great ventilation. The fumes are really REALLY bad for you. Like cancer bad. Don't risk it. Just not worth it.

Prepare the area. I used a large sheet of cardboard. WEAR DISPOSABLE GLOVES! Stuff is sticky. And won't wash out with simple soap and water.


1) Thoroughly mix the resin and hardener in a plastic (disposable) cup. (2 part resin + 1 part hardener) Try to limit the bubbles when stirring.
2) With the brush, layer a thin coat of resin on the area you are going to apply. About the size of the fabric you have.
3) Lay on fabric
4) Lay on another thin coat of resin over the fabric. Making sure it's thoroughly soaked. Especially all the edges.

TIP: Don't mix too much resin at a time. Only mix enough to work on for a half and hour. If you lay too much fabric at one time, it might get heavy and start to sag. Better to work one layer at a time. And in one area. Too much resin.. would just pool down.. making a huge mess. And possibly sticking your work onto the cardboard! Ruining everything. (Trust me, I speak from experience here!) You'd be better off spreading the work across a few days. Working in small sections at a time.

TIP: Keep a towel nearby. Wipe stray drops the moment it lands.

TIP: Don't OVER soak. Too little resin, the fabric would come off and you'll lose strength. Too much resin, and it'll become brittle and crack.. and you'll lose strength. Find and learn that balance.


Overlap each piece a little. This would give it the strength and flexibility. Try not to go past the edges. It'll be more work for you later if you do. And that would involve a dremel tool. 

Hang it up to dry. Make sure the shape is correct. Not skewed to one side. At this point I have no idea if it's the correct width. I may need to make adjustments later.


Sunday, 22 January 2012

Toughen up!


This is what I'll be using for the laminating resin.
 System THREE mirror coat epoxy resin. It's an A + B mix. (One pint of A and 1/2 a pint of B costed me roughly $30) Where it's a 1:2 ratio. I've used many other different brands and types of resins. Where you it's calculated by volume. The MEKP hardener is added in 1:40. That's a really hard ratio to mix! It's like a small cup of resin to a few drops of hardener. I never know if I get it right. With the System THREE, it's SO much easier to see. The "mirror" just means it's super clear. Dries like glass. Great for top coats too.

The brushes are from Dollarama. 6pk for a buck. Love it when it's disposable. Cause it has to be. You can't reuse the brush after one use.

The measuring cups are from Industrial Paint and Plastics. Same place where I picked up the resin.

 Once i mixed up the ratio into a plastic cup, I stirred quickly. Trying not to create too many bubbles. Bubbles causes weak points in the resin.

*TIP: Prepare your workspace! Even though this brand of resin is 'indoor' use, it should be ventilated anyways! Better safe than sorry. Stuff is toxic. Cover up your workspace properly. Any drippage of the resin will be next to impossible to get out later. It would bond to anything! Gloves is a must too.

With an old coat hanger, I hung up the piece to dry. It should be hard for the next layer in about 8 to 10 hours.