Showing posts with label mohawk. Show all posts
Friday, 16 March 2012
Random Progress
Polish:
The "camera lens" in the mohawk is a bit dull. So, I grabbed my bottle of 'fine scratch remover'. It was for polishing up tiny scratches on my rear plastic window on my convertible. Grabbed a towel and rubbed the face up with lots of elbow grease.
LED test:
While I was wiring some of the LEDs, I noticed one of them had a bad flicker. So, I cut it out of the system. As decided to use it for experimenting. I wanted to see if I could diffuse the LED bulbs a bit. And I know hot glue dries cloudy. So, I put the two together....
I globbed some hot glue right ON the LED bulb. And let it dry. You can see in the pic... the LED bulb is completely "submerged" inside the wad of hot glue.
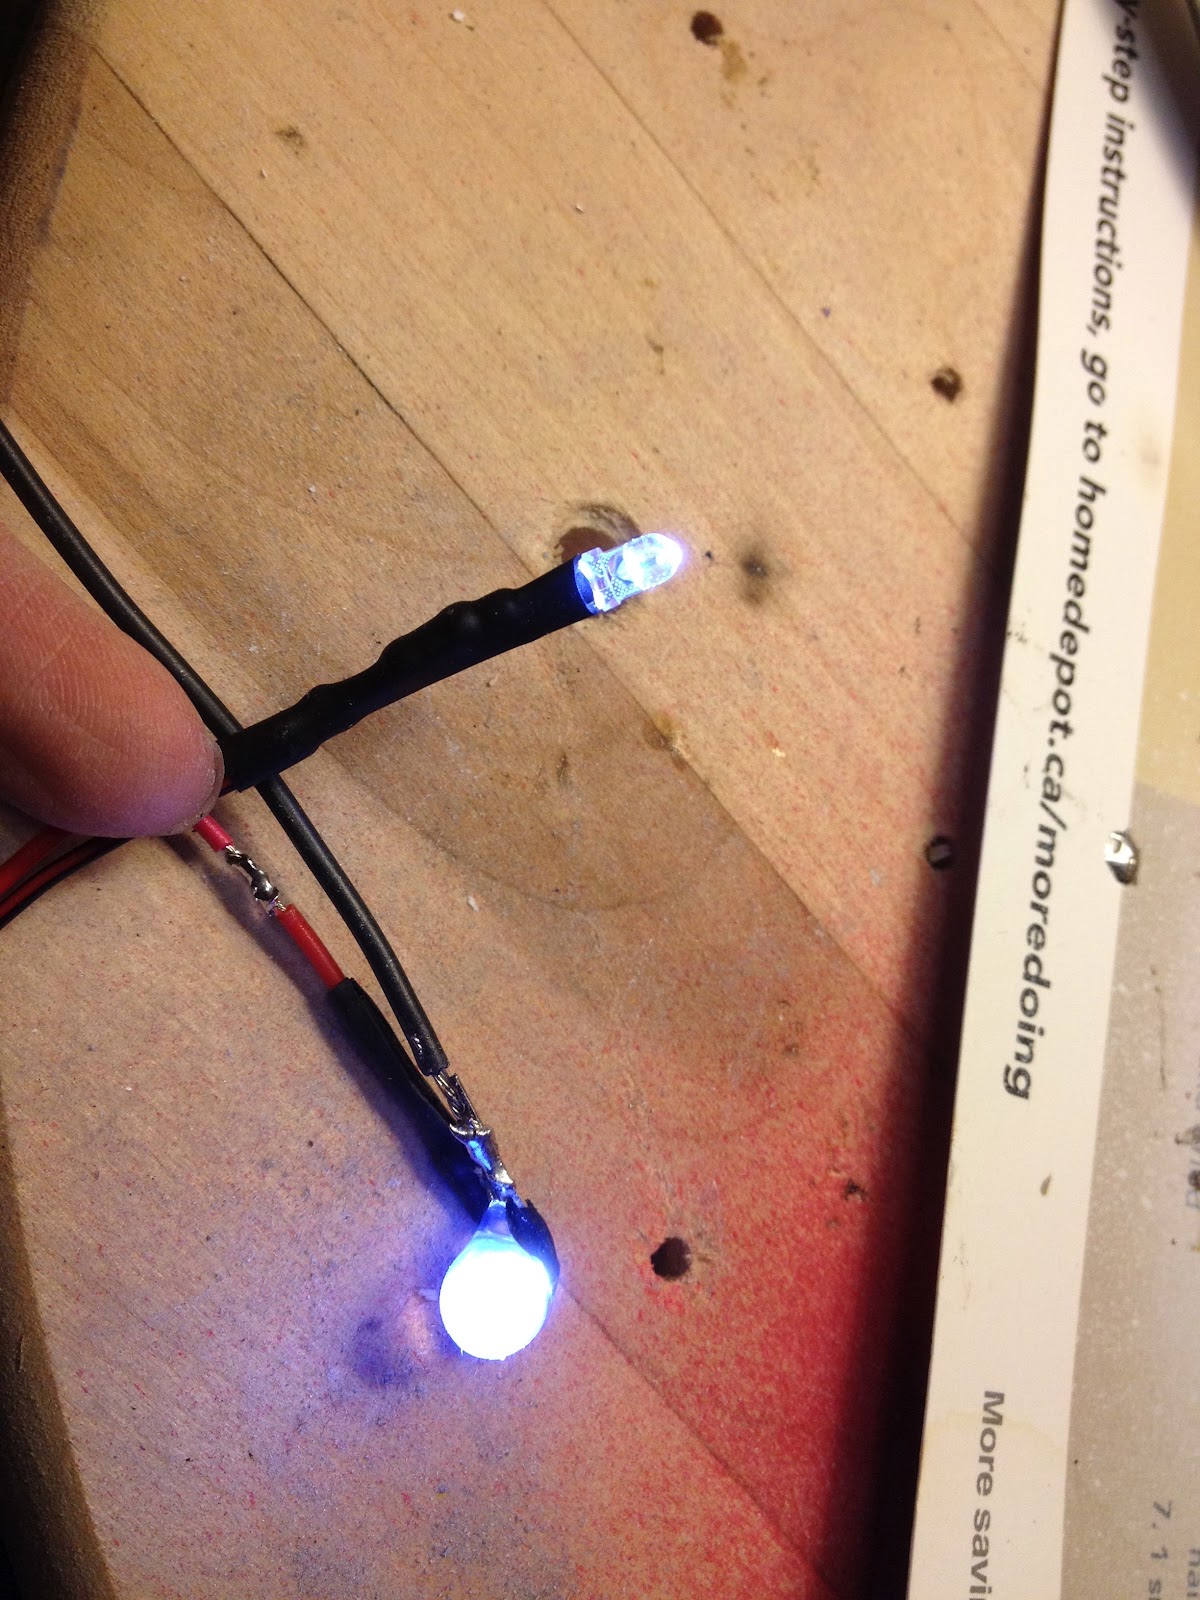
Test wired it to my battery... and voila! A nice diffused glow! Success. I'll do this to a few of the bulbs in the "camera lens"
Wire connectors:
Bought some quick-release wire-to-wire connectors for some parts of the electrical work. The fins are separable, so these are needed. I'm not really liking these types. But I couldn't find any better alternative. These were pretty prices too. Don't like pricey.
Saturday, 10 March 2012
Hook me up
Wiring:
Back on the electric work. Had to figure out how I wanted the switch to turn on/off. And how to wire all of the fans and millions of LEDs
Use my vice and alligator clip (held in place by a piece of placticine) to help me hold the wires so I can solder them together. Everything is multipurpose! hehe
Heat shrink wrapped the connections. Not necessary. I just want to do it right.
LEDs:
I had to sample test the LEDs in the mohawk lens. Needed to know how many I would need to make this thing look cool.
Maybe just a few more.. hehe
Man, there's so much more electrical work to be done:
- the fans
- the machine guns
- eyes
- V-fins (still waiting for more LEDs to come in the mail)
And all these needs to be hooked up with quick release connectors. For easy battery swap outs.
Sunday, 19 February 2012
Tuesday, 14 February 2012
Random Progress
Hotgluing in the "sideburns"
I accidentally cut too much of the head. It was meant to be an area where I can put Velcro tape. The plan was to hinge the entire "Mohawk" piece open. The intent is for easy access if I ever needed to. Gluing down the mohawk would limit the light into the helmet if I ever needed to fix anything or add anything. Thinking ahead! (Ironically.. I didn't)
So, I had to insert a piece of plastic to serve as a base.
The head brace is attached to the helmet by a combination of epoxy putty and hot glue. Strong bond. 4 anchor points.. for now. I'll add in 2 more later.
Now for the comfort part. I cut up small strips of anti-fatique matte (I had some leftover from another halloween costume)
Hot glued them in.
Labels:
assembly,
chicago screws,
cosplay,
costume,
design,
details,
epoxy putty,
freedom,
glue,
gundam,
halloween,
head,
head brace,
helmet,
hot glue,
mohawk,
strike,
velcro
Lock that face
While I got the face to retract all good now. It doesn't have a stopper on either the down or up position. A lot of ideas were thrown around for this. I even wanted it to be motorized using servos and stuff. But, that may be too complicated. And more importantly, too heavy. That's a lot of weight.
So a simple magnet system was made. One to catch it when the face is down, and another to catch it when it's up.
I used rare earth magnet. 3 total. This one is on the face. No 2 magnets actually touch each other. Because they're just too strong! I had to separate them with a piece of plastic.
The second magnet is on the brow lip. This one would catch the face when it's in the down position.
And the third magnet would be up on top. To catch the face when it's in the top position.
The magnet on top is held down by epoxy putty. Love this stuff. Dries hard. Like cement hard.
(that's what she said)
Labels:
assembly,
cosplay,
costume,
design,
details,
epoxy putty,
gundam,
halloween,
head,
hot glue,
mohawk,
plastic,
retractable,
strike
Tuesday, 7 February 2012
I can't breathe!
On the subject of ventilation, I was thinking where I should put my mini fans.
Since I cut out these side vents, I can place the fan units behind a screen inside the vents. Heck, I can even rig it so I showcase those running fans.
Even though these fans run super silent, having them an inch away from my ear can still be annoying. If it's not the fans' noise, then it's the air being pushed through that I will hear.
...Or I can place them behind the vent holes/nostrils. This would give me direct flow of fresh air. I think this route is best.
And to vent the hot air outward, I chose the most logical place. On the tail end of the "mohawk" piece.
Subscribe to:
Posts (Atom)