Showing posts with label freedom. Show all posts

Thursday, 19 April 2012

Vintage Pilot!

Today, I was super fortunate to come across a vintage toy. A 1989 Countdown Astronaut G.I. Joe figure! (ok, i'll be honest, I had to look him up.. but, he's VINTAGE!) My brother-in-law knew I was looking for one. Because I needed a pilot to put inside the cockpit, of course!


So, I quickly whipped up a chair for him.


 Very cozy


 Yea, of course the screen lights up too!


All painted! Ready for the big show!!


Sunday, 15 April 2012

Gundam: CHEST

After putting the helmet on, I'm not satisfied with the weight balancing on it. It's just too front heavy. Since the comic convention/cosplay is happening this weekend, I don't really have time to rebuild the head. But, I can build a chest (and maybe shoulders). This way, I can anchor the helmet to the shoulders.

The chest would be made from the same foam I used on the Zaku project. So, it'll be fast.

The design is mostly from the original Strike Freedom again. And, again, I'll be modifying to make it SD(super deformed) so it'll look proportionally smaller than the head. Still going for that goofy look. I'll use my sketch as a base.


Friday, 30 March 2012

Sad Gundam Is Sad

I'm sad. Sad that the helmet doesn't sit as comfortable as I'd hoped. The heavy V-fins drags things down a bit.


Threw the head, batteries and all, on a scale. 5.5lbs! Doesn't sound like much, but when most of that weight is 6 inches from your forehead. That weight doubles! At least it feels it. So, I have to consider further weight loss. I'll have to revisit the V-fins again. But, this will have to weight. I have other projects I want to tackle first.

Thursday, 29 March 2012

The Damage


Grabbed all the receipts I collected for this project and did a tally. All the tools I had and some of the material (like the plastic) I had around the house, I won't add to the total. (But, I'll still give a rough price on them)


Tools I used:
Dremel tool with various attachments (cutting, drilling, buffing, sanding)
Sandpaper
scissors
pliers
needle-nose pliers
tweezers
X-acto blade handle
cutting mat
misc sized grippers/clamps/clips
soldering iron
heat gun
saw + mitre box
drill press
spray booth
airbrush + compressor


Here's the damage:
(10x) Superglue = $10
X-Acto blade refills = $1.59
Disposable gloves, measuring cups, brushes = $2 for the brushes (Had the rest)
Tamiya Putty = $7 (Already had it)
5 min Epoxy (2 part) = $1 (Already had it)
Plastic Cement = $2 (Already had it)
(7 cans of spray) Paint = $38.50
Hot glue sticks = $1 (Already had it)
duct tape (Already had it)
masking tape (Already had it)
Heat shrink wrap (Already had it)


Electronics:
(2x) 9v Batteries = $6
Wire-to-wire connectors = $25
Wires, (2x) micro fans, (4x) micro switches = $21
(2x) fashlights = $2
(50x) 3mm LEDs = $11
(6x) 3mm flashing LEDs = $12


Card stock = $7 (probably should've gotten this for free if I asked one of my friends that work at an office)
Resin = $30 (Already had this)
Sheen fabric for reinforcement = $7
HUGE sheet of 0.08 gauge plastic = ~$40 (Already had this)
3/4" (24 gauge) All Round Galvanized Bracing = $7? (Already had this)
(2x) Chicago Screws = $0.40
(3x) 1/2" round, 1/8" thick Rare Earth magnets = $4 (Already had this)
(3x) Decal sheets from Kinko's = $6


TOTAL: ~$149.49


That's with ALL the electronics. Not bad! It would be easily under $100 if I didn't choose to have any electronics or have the retractable face.

Tuesday, 27 March 2012

Decal Description

The decal description:

1) Danger: Watch Your Limbs and Man/Woman washroom icons. Hey, pilots needs to go too!
2) Do Not Touch Boobies Without Specific Authority: Always Be Ninja-like
3) Danger: Hot Oil Not For Cooking
4) little grey marks under the machine gun... are tally/kill marks. (of ZAFT/FAITH kills)

5) QR code to this blog. Figured, I'd be tired to explaining my whole process over and over again. So, I'll just direct them to the code. Let them take a picture of it.. and peruse it on their own time. hehe
6) EFSF: Earth Federation Space Force
7) random stuff
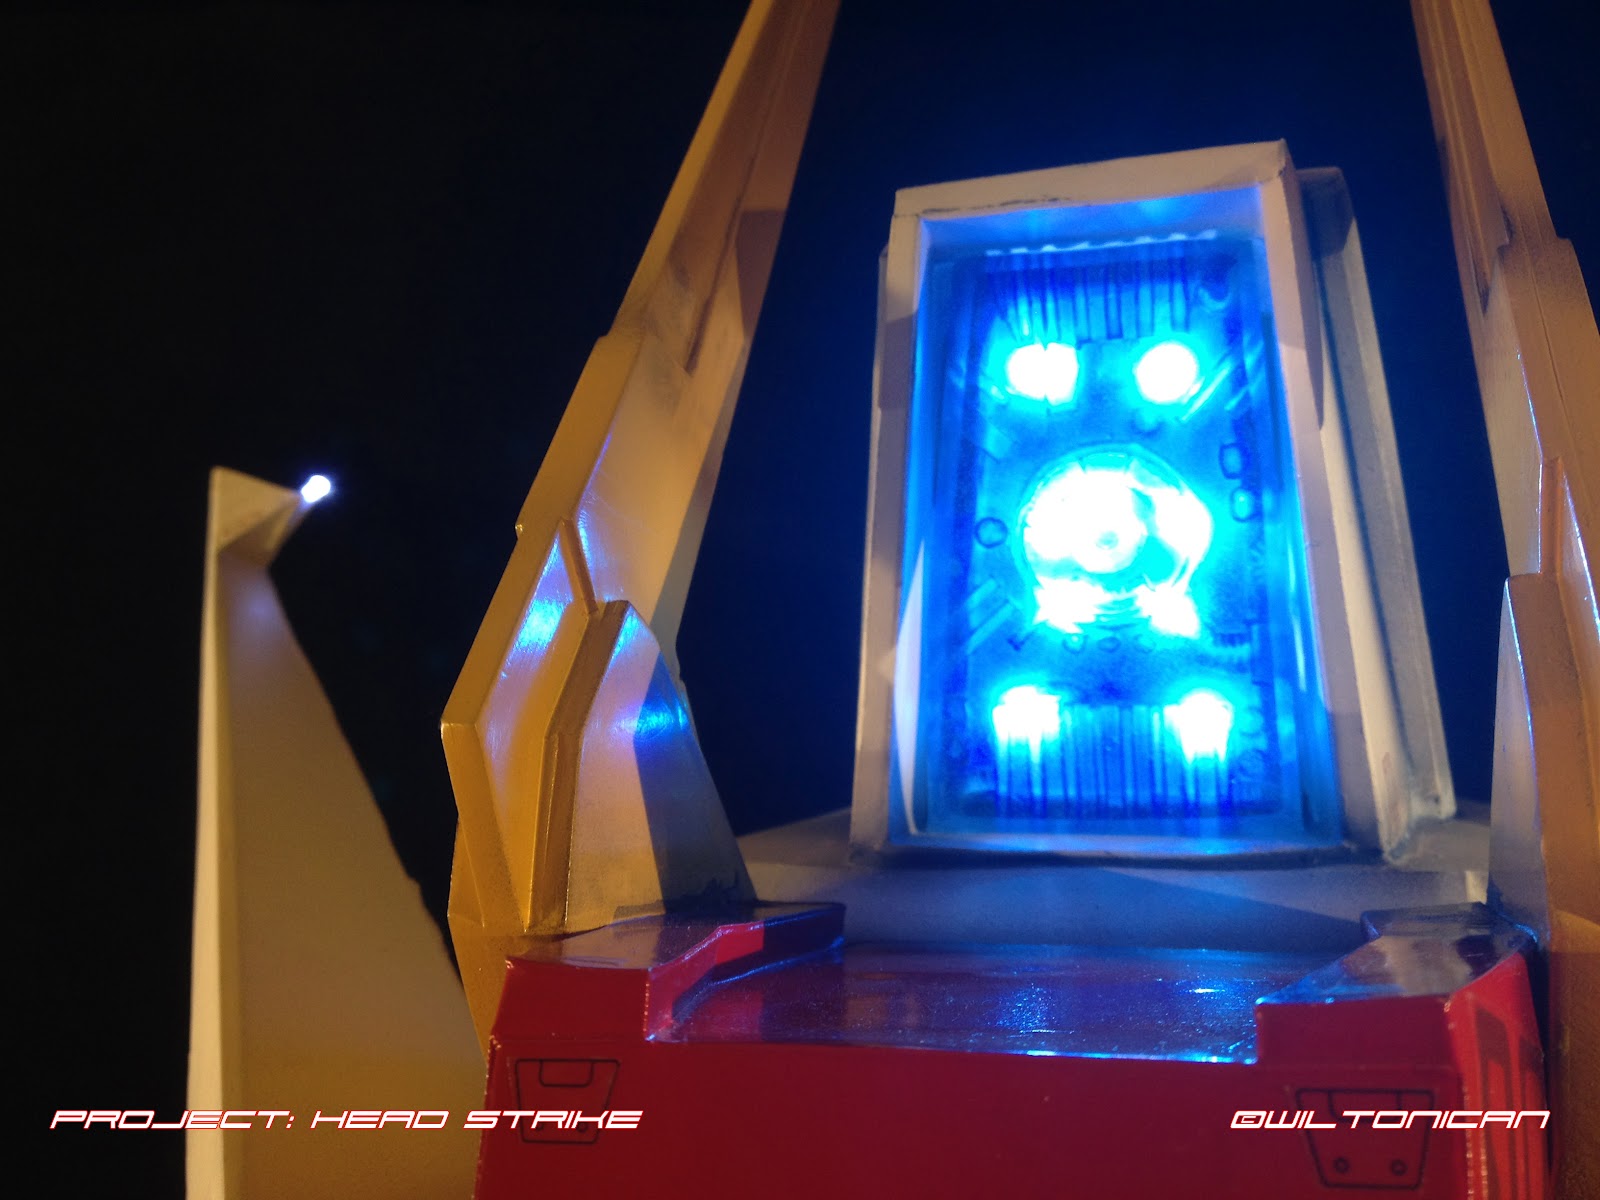
8) just a close up shot of the camera lens

9) -Warning- Do not pull the envelope. Only push it.
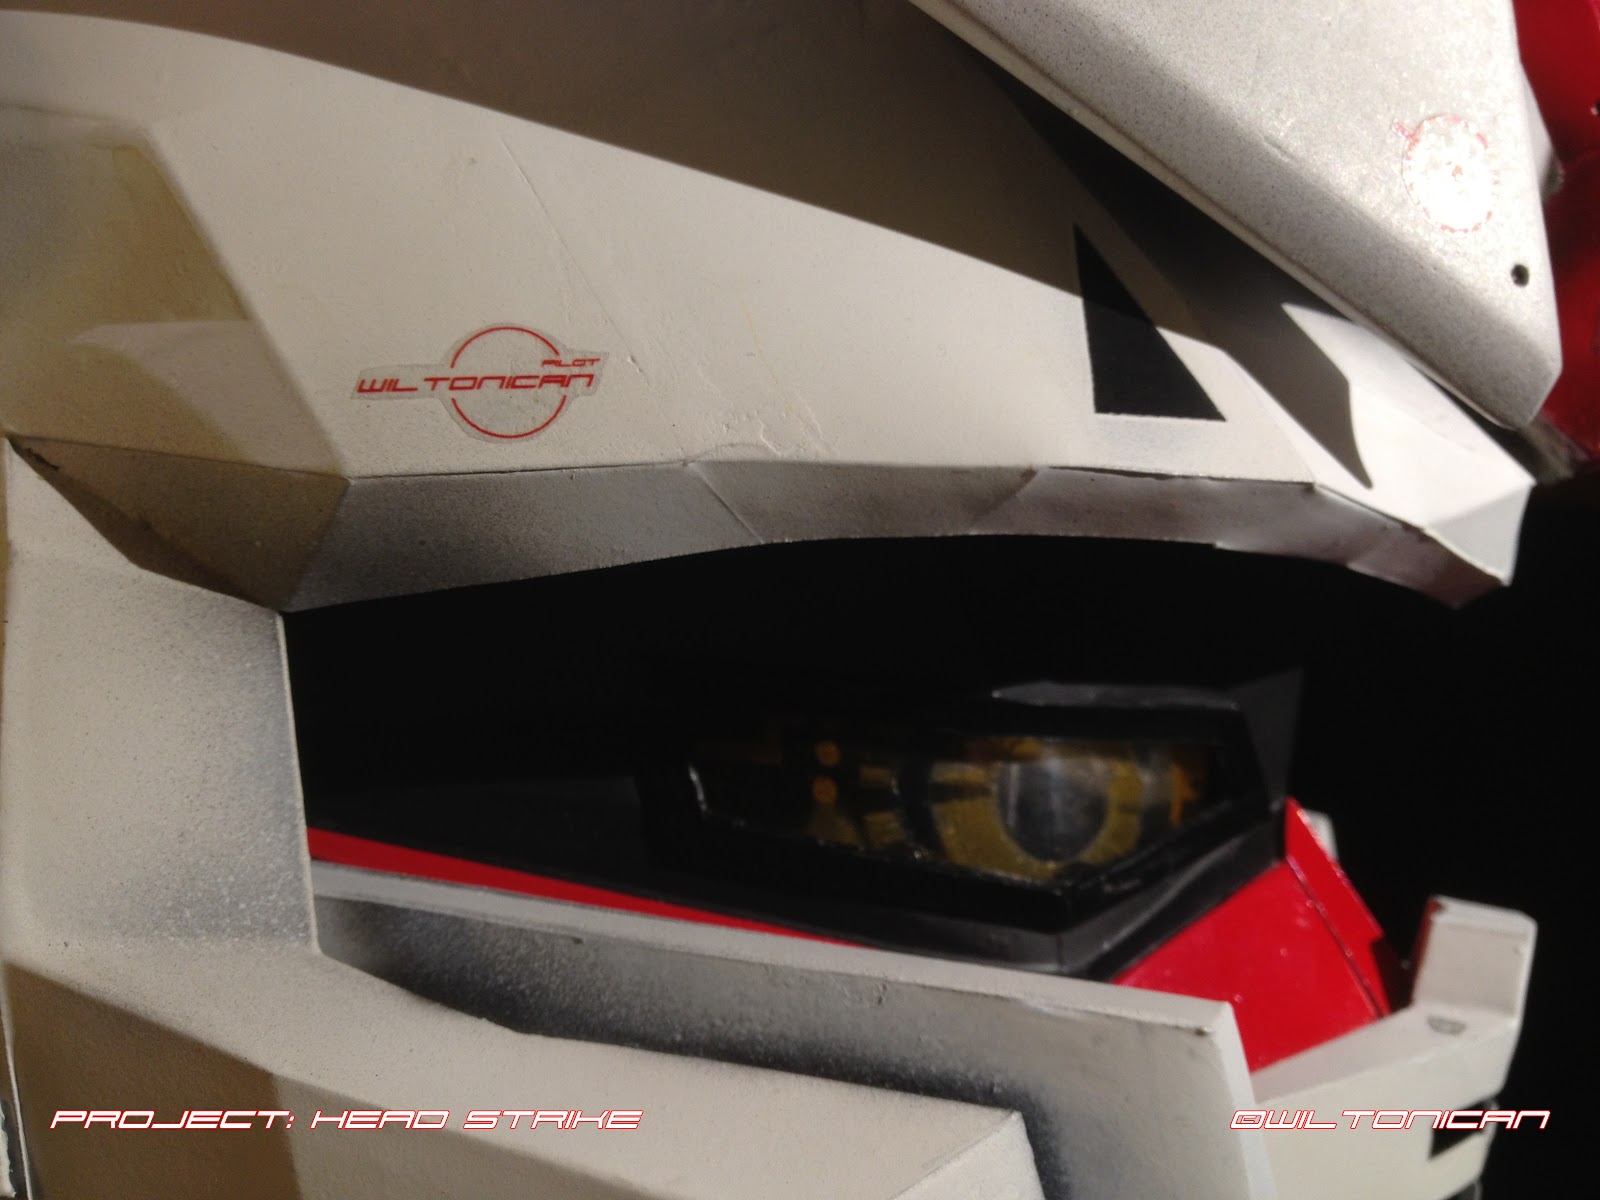
10) Decal for my eyes only. Since it's in the inside of the helmet. It's to tell me what switch does what...in case I forget. Icons should be self explanatory.
11) Right side, near exhaust: Danger: Hot oil. Not for cooking
12) Pilot: Wiltonican

Monday, 26 March 2012

Final Details

Here are some close-up shots of the helmet. Showing ALL the embarrassing blemishes that any supermodel would simply freak if it was ever shown on a magazine cover. I wasn't worried about them cause, frankly, no one's gonna see them... except you, here, online. When I'm wearing it, walking around... I'll be a blur.

Just for you guys, I've put in a few easter eggs in the decals. Can you spot them all?


Sunday, 25 March 2012

FINALE!


Finally finished! Pretty happy with the results. 

- Roughly 2.5 months in the making (I really did take my time with it)
- It's running on 2x 9v batteries. 
- 4 switches: 
          1) 2 fans 
          2) 17 LEDs in V-fins, Mohawk lens, exhaust, and a couple in the ears 
          3) machine guns 
          4) 6x LEDs in the eyes
- Retractable faceplate. For extra vision, talking, eating, etc.

I'll post details in the next post.


Details Painted

Final Details Painted:

It's the final stretch of the build!


Masking the inside of the face again. To paint it matte black so the remainder of the wires are "invisible" Also painted the LED side that's face me. (So the glare won't hit my eyes)