Showing posts with label superglue. Show all posts

Sunday, 5 February 2012

Horns: part 4 (Assembly)

"Crown" or Base:

The Base is where the horns will be attached to. And the base itself attaches to the forehead of the helmet

Inside (and out of focus), you can see 2 black strips. These are metal plates. (Random junk I found around the house) These are glued down with superglue. Their purpose for which I may or may not use, is the contact points in which the magnets would attach themselves to the rest of the helmet. (the forehead)

 Ripped up a square of paper towel.

These are for "fillers" inside the "crown" and the "horns". It would fill the empty space inside, grabbing the wooden posts and sticking them onto the inside walls of the horns.

Backside of the entire assembly.

- Metal plates (shown in light brown)
- Paper towels (shown in green squiggly lines) - They fill the volume of space inside
- Wood with screws (shown in grey) - The paper towels are soaked with resin and would 'grab' onto the wooden dowels and nails. Just randomly wrapping around them. Making sure the towels also touch all sides of the walls.  Both unifying everything and giving it strength.

You can see the entry holes where I pour my resin into. Filling whatever space there is. This would give the proper solid feel to the entire assembly.


80% done. Ready for details and paint!

Saturday, 4 February 2012

Horns: part 3 (Assembly)

Horn Assembly:

"Horns" all cut and glued. Time to finish it off all the edges with a little modelling putty.
(Pic above: underside with detail)


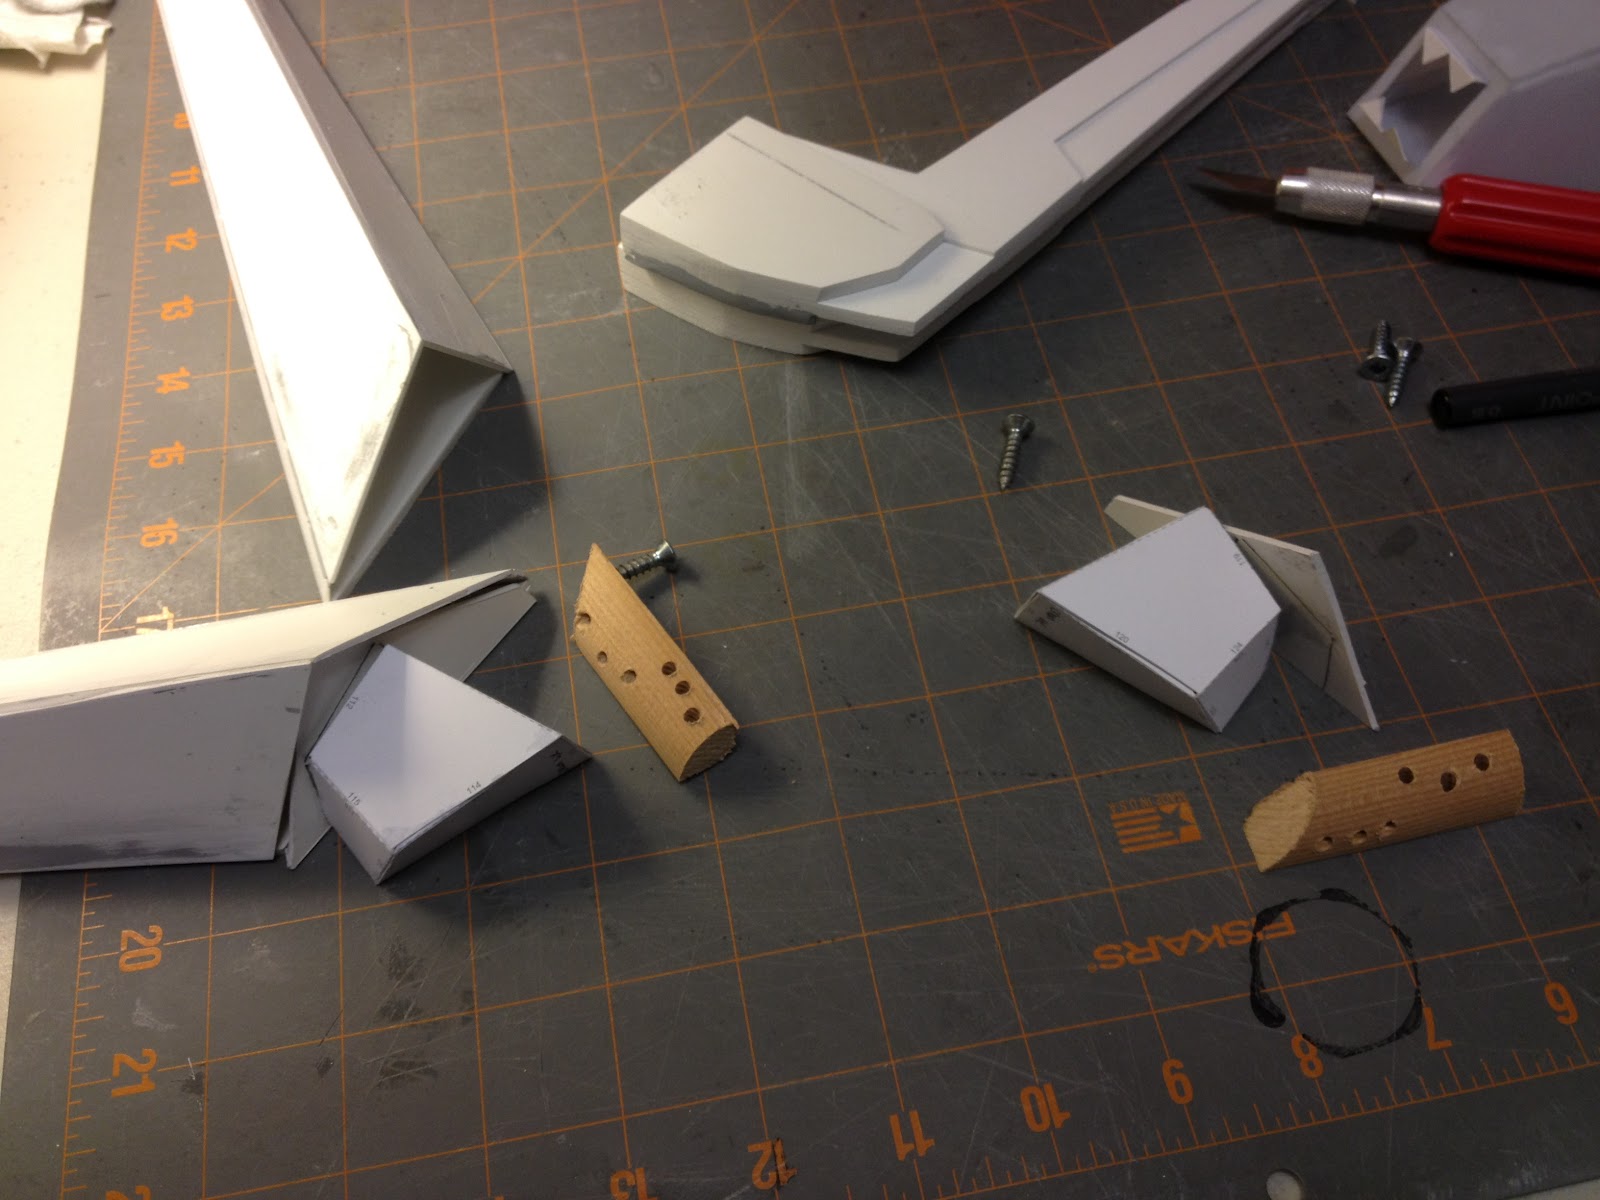
All edges sanded smooth. I left the 'end caps' open. Reason being I needed to figure out how to anchor each horn onto its base. If I were to simply just glue the cap on... it would be fine, if it was a model that I let sit on the shelf. But, this helmet needs to endure a lot of motion. The thin bead of glue would never hold its weight of the horns, it would tear it off the base pretty fast.


Looked around and found some scrap wood. This will give it a good anchor to the base. So, I plan on using resin to bind it all together. Drilling random holes into the wood to give the resin something to grab onto. A few screws would help this too. You can tell, I'm totally improvising now.


Totally forgot to mention where I got my inspiration from. A model of a Strike Freedom Gundam by an artist Min Bong-Gi. His work is simply awe inspiring.


My costume will be 80% from his design. And I'll throw in things here and there.

Friday, 20 January 2012

More Assemblage

Front half of the helmet and face assembled. It looks like there's enough room for my head. I still think it's going to be a close fit. Considering the face will need to retract up into the helmet area.


Decided to cut out the vent holes on each side. I can put some cool detail in there. Haven't decided on what though. The vents can actually serve as real ventilation too. I know from experience, these masks get stuffy fast. Any fresh air would be welcomed. I'm planning on having battery operated fans inside this time! That should improve airflow more.


Finished the helmet. Mock placement. I'm liking how things fit so far. Moving forward to the details!


An old prototype inside

Wednesday, 18 January 2012

Assembling

Glue:
Glue I used is your typical cyanoacrylate. (Aka Super Glue or Krazy Glue) Found some tubes for a $1 each!!! Yea for Dollarama again! (Name brands doesn't really mean anything here.. only difference is price!) I loaded up on a few. I think a project this size will take around 4 or 5 tubes.


Be prepared to work fast. That's why the pre-scoring helps tons here. A quick test fit would be smart too. To make sure you know which side the tab should go.

And expect to get glue all over your fingers and workspace.  No matter how careful you are with it, it will get messy. Nature of those silly little metal tubes. I always over-squeeze.. and it'll shoot a glob all over. Never fails.


This one particular shape have and will give me problems. Notice how all the polygons converge all into one tiny point? That's bad modelling in Maya. Blame it on inexperience. Blame it on bad design. Blame it on laziness. Whatever.. I just suck at modelling. Folding those thin triangles will be a pain later. No worries.. I'll get er done.


"Goatee" Assembly:
 "Goatee" (red part sticking out of the chin) is assembled. Here I'm leaving a hole unglued. It's so I can pour resin into it. A process that would harden up the paper. (I'll explain this process more later)


Face Assembly:
Inside of face

Unreinforced face assembled. My daughter testing it out.