Showing posts with label hot glue. Show all posts
Showing posts with label hot glue. Show all posts
Wednesday, 29 August 2012
Project Zaku: Harry Potter
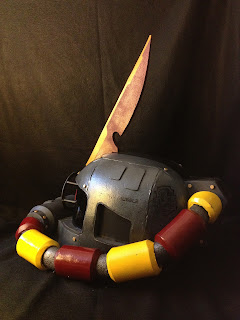
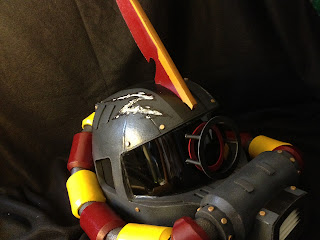
Wow.. I've been busy. I did get to finish off another Zaku for a friend. He wanted a themed one. It was a special request.. as I've known him for 30 years now... maybe more.
This one was fun!
Labels:
1:12 scale,
assembly,
chibi,
cosplay,
costume,
craft foam,
design,
figure,
foam,
for sale,
fundraiser,
gundam,
halloween,
harry potter,
head,
helmet,
hot glue,
minicell foam,
scale,
zaku
Wednesday, 18 April 2012
Zaku: Monoeye lens
Time is running out. I needed to make a decision on the mono-eye fabrication. Many options had gone through but none would look good or had too many safety compromises.
This one is the least that looked the best. Still kind of dangerous though. O well, I'll have to keep an eye on her then. (uh.. sorry)
Lexan plastic. Heating it up in my toaster oven. When it starts to droop in the window, I pull it out right away.
The best form I had around the house was this paint can. Whatever works!
Perfect diameter
To shape it further, I just took it to my belt sander.
For the tint, I used some leftover auto tint.
Made a small accent ring out of craft foam. Hotglued it on. And voila!
Now, all i have left to do is:
- screens in the side windows
- hot glue the lens in
- custom cut some foam to fit my daughter's head
- maybe another final coat of top coat to seal things off a bit more for durability
Labels:
1:12 scale,
cosplay,
costume,
craft foam,
design,
details,
face,
foam,
glue,
gundam,
halloween,
head,
helmet,
hot glue,
lexan plastic,
zaku
Tuesday, 3 April 2012
How to make Sausage Links
Pipe Links:
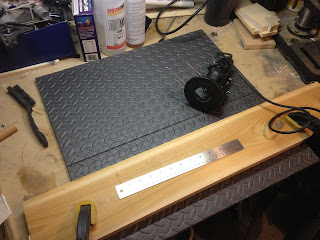
Back with my trusty Dremel tool. Love my Dremel. It came with a mini-router attachment. How cool is that!?! What this allows me to do here is 'router' a channel at a perfect 90 degree. It would be impossible to do this by hand. I could, but it'll take forever and it won't be as accurate. Here I have a rig with a board and a couple clamps.
The steps:
- I make one channel across.
- Stop.
- Move the board ~3/8" up.
- Make another channel.
- Repeat.
Reason I'm making all these channels is so that one side of the foam has less material. This is so I can roll the foam into tubes. I could use the heat gun again. But, it won't be heated up evenly and it'll bend unevenly. It would just be a mess. I think this was the best approach. Hot glue the ends together.
Made a bunch. Not really sure how many was needed.
Like the 'nostril canister', I beveled the ends on the belt sander.
The placement mockup. I think it'll work. Next, I have to figure out what to use for the inner pipe.
Labels:
chibi,
cosplay,
costume,
design,
dremel tool,
foam,
gundam,
halloween,
head,
hot glue,
pipe,
zaku
Monday, 2 April 2012
Shell Formation
This build will be fast. I won't be going through the CG and Pepakura process. I'm going to build it the old fashion way. By eye!
Here's the initial formation of the shell.
Cutting it into strips. Heat gun to warm up the foam so it's pliable. Shape it over the form. Holding it for a few seconds until it cools. Once the foam cools, it'll hold it's shape.
Repeat with every shape on the helmet...
Taping it up to check fitment
Once ok, it's time to pull out my favourite[sarcastic] tool, the hot glue gun. Glue all pieces together.
My client/boss:
Friday, 16 March 2012
Eye Lens Redux
Eye Lens:
Here we go again! My second (and hopefully FINAL) attempt at making the eye lens for the build.
To recap my requirements on this sub-project:
- Must not limit my vision, much
- Should have detail
- Tinted yellow
- Must be lit up.
- Lights must not be seen from the outside
- Lights must not be glaring back at MY eyes.
Had put a lot of thought back into this one. Going to start off with a piece of clear lexan plastic. I think this is good approach.
Since I already have the shape of the eye lens from the previous build attempt. I'm going to use it as a template for the curvature. Here I'm laying it down on a piece of 2x4 wood. I needed a shape to put the melting plastic onto. And the wood can handle the heat.
Cutting the shape out with a jigsaw.
I stole this toaster oven from my wife years ago. Started out when I was secretly baking my sculptures in it before. Got caught by the wife.. and said something, something.. and she just gave me the oven! Woohoo!! Score! Anyways, inside the oven is a couple strips of lexan plastic. Warming it up for 5-10 minutes. The moment I can see them droop, I pull them out and put it on my wooden form....
Almost lost this piece. You can see some bubbling at the corners! Luckily, the bubbles are outside and would be cut off.
Cutting them out with my dremel.
Quick test fit. PERFECT!
Now, for the details. I'm thinking of frosting them in. To achieve that, I just mask out a simple design. With my dremel again, I used a steel brush attachment, and just went over the exposed areas.
I could use some fancy window etching solution to frost the details. But, that would mean money. And I rather not spend money if I didn't have to. The return wasn't worth it. Simple economics. hehe
TEST: Can I see out of the new lens?
Yes! Yes, I can. Even in the frosted areas, I can see vague shapes. So, this is successful.
TEST: Does the detail light up?
Yes, perfectly!! Success, again!
TEST: Are the lights visible from the outside?
Nope. Since the lights would be mounted just out of sight. It's perfect again. Another Score!
TEST: Would the lights be glaring back into my eyes/face?
Nope, eventually, I will be mounting the LEDs with hot glue. Then I'll be painting the globs with dark matte paint. The light would only be directed at the lens itself.
PERFECT SCORE!!
Labels:
cosplay,
costume,
dremel tool,
eyes,
face,
flat black,
freedom,
glue,
gundam,
halloween,
head,
hot glue,
LEDs,
lens,
lexan plastic,
lights,
plastic,
strike
Monday, 12 March 2012
Hot Glue Sucks
Hot glue:
Never said it before, so I'll say it here. I really dislike hot glue. Not a whole lot of positives, but I can name quite a few negatives....
- takes time for the glue gun to warm up
- glue gun is awkward to use in tight spaces
- glue sticks always run out. all the time.
- MESSY!
- those spiderweb-like strands with each use. And it's endless!! You just keep pulling and pulling
- not really a strong bond.
- dries cloudy
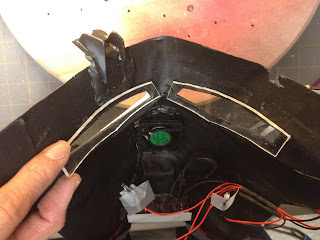
Obstacle: Here, I robbed some hot glue in the area where I was to place the fan. But, it rolled over into the fan blades!!!! UGH!!! Glued them down. I had to go back in, cutting and re-melting the hot glue to rip the fan unit out. Some more cutting and sanding got the blades free. Hot glue sucks.
Finally got the fan to work again! Wired up all the LEDs for the eyes too. Here, I'm testing out the switch for it too.
Subscribe to:
Posts (Atom)


